Latest Posts

Vegetarian Fall Fried Rice

A couple of weeks ago I decided to give Meatless Monday a try, a decision that met with many protests from my husband (I don’t like veggies, I like meat, I am a man! I need meat, But meat is delicious, I am not a rabbit, etc. were some of the arguments that arose). But I had some great arguments up my sleeve; Vegetables are good for you and this family, I am the one cooking! You will eat what I make, You are acting like a baby! Even our daughter is embarrassed for you!

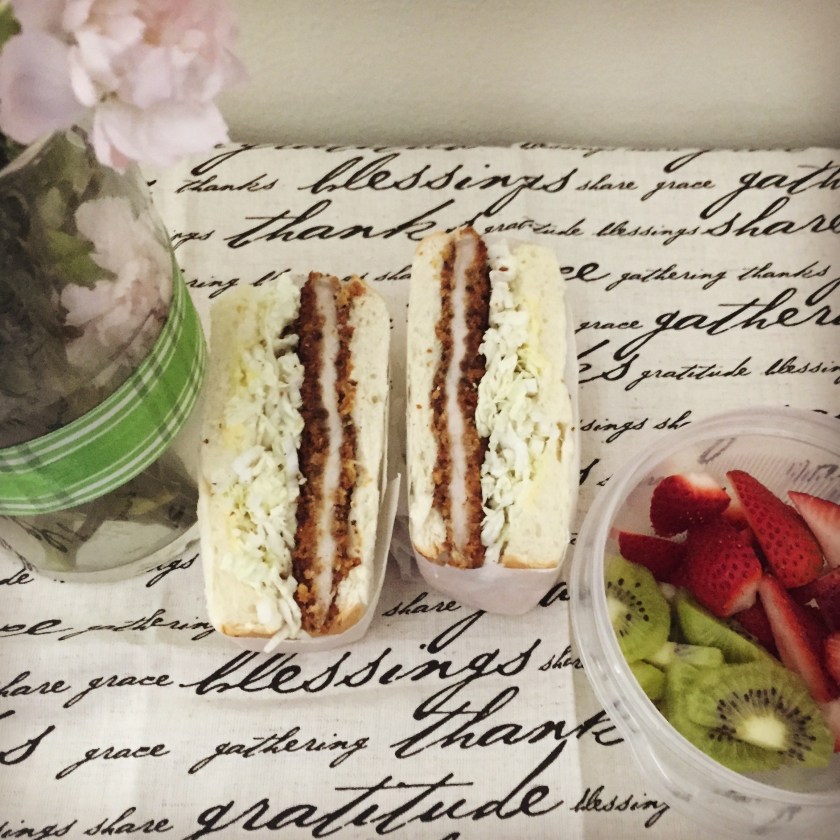
He ended up eating a peanut butter sandwich >_< still meatless though, Ha!

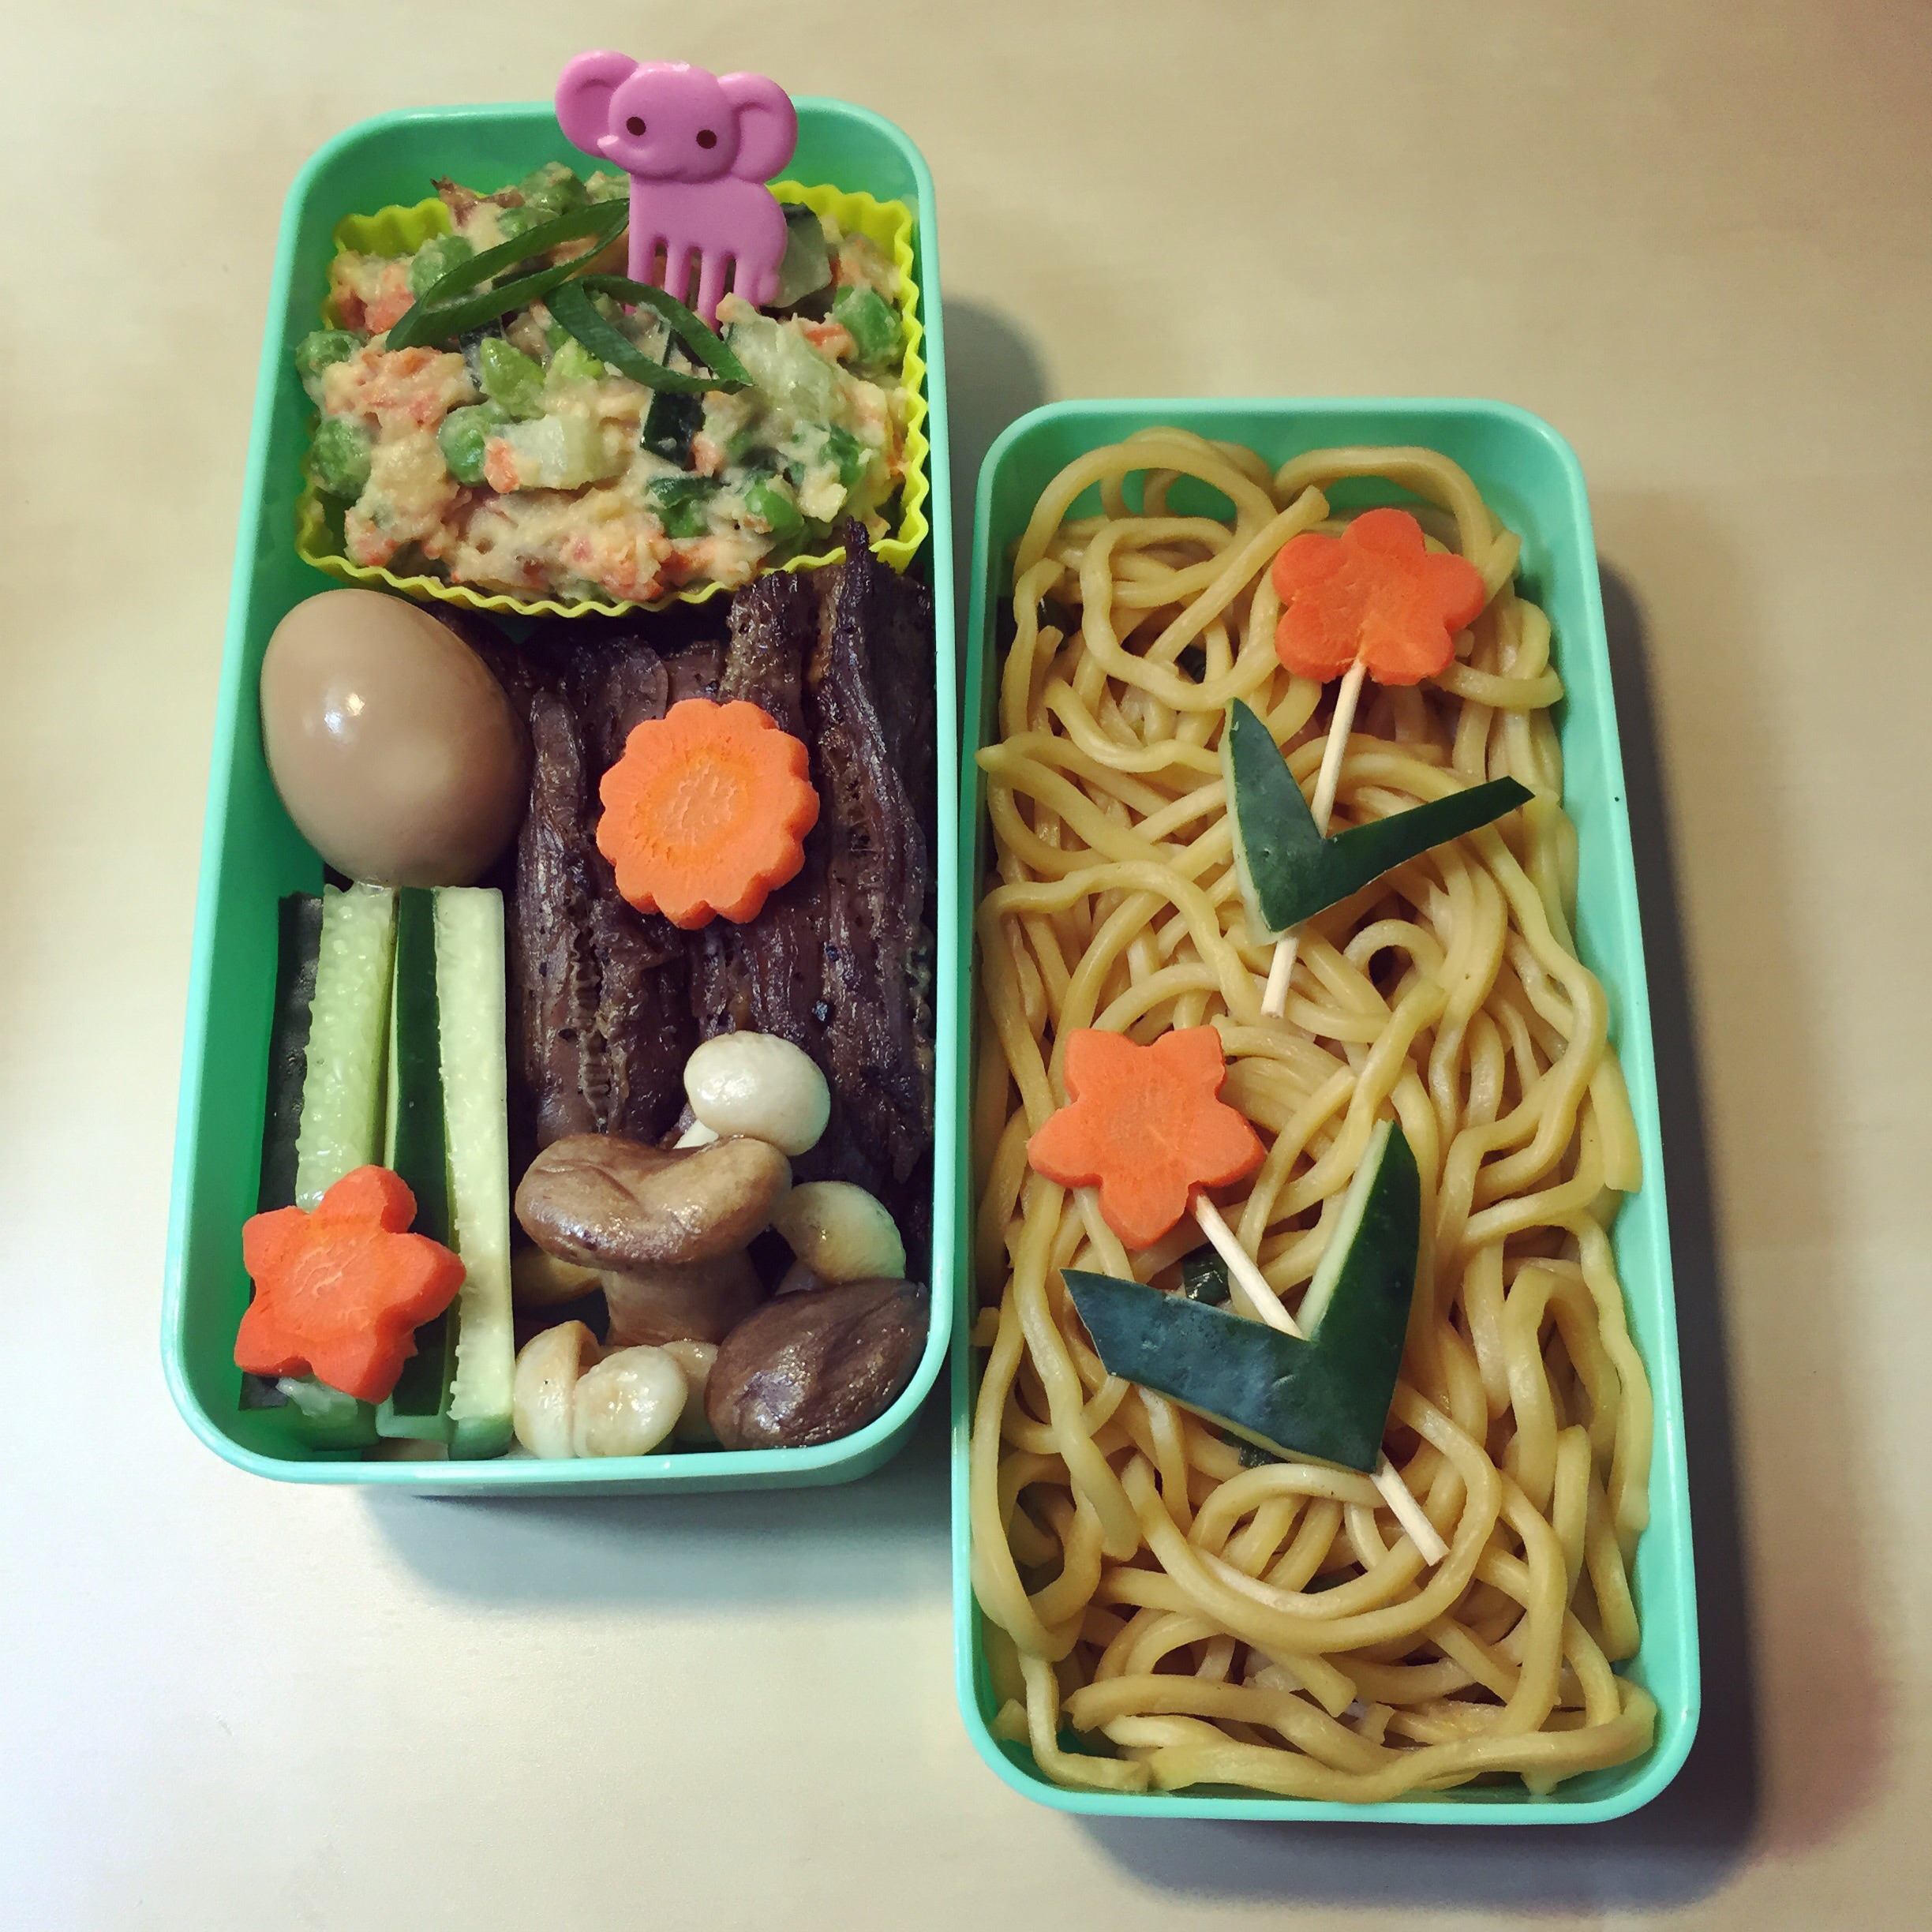
Here is the recipe for the vegetarian fried rice that the rest of us enjoyed that day. It is great as a fall dish since it uses a lot of ingredients that are seasonal right now.

image

Ingredients:

-Cooked white and wild rice mixture. (1/2 cup pre-cooked wild rice to 2 cups white rice)

-1 Zucchini chopped

-2 Carrots diced (diced is smaller than chopped)

-1 package of mushrooms (baby bella, cremini, or white work well) chopped

-1/2 yellow onion chopped

-1 Tbsp garlic minced

-2 eggs

-1/2 cup soy sauce (add sparingly, little by little, you might not need all)

-3 Tbsp sesame oil

-1 tsp mirin (can substitute with 1 Tbsp of sake)

-2 sprigs of green onion diced

Set a pan to medium high heat. Once hot add 1 Tbsp of sesame oil and chopped carrots. Season carrots with salt and pepper to taste. Add the mushrooms. Saute both of them, stirring often until soft. Then do the same with the zucchini: 1 Tbsp sesame oil, heat, season with salt and pepper to taste, just saute until browned. So, pretty easy so far, just set aside all the vegetables as you saute them.

Now add the last Tbsp of sesame oil, the garlic and half the onion, let it saute for about 30 seconds then add the white rice and wild rice mixture. Cook for a minute stirring constantly. Then add carrots, mushrooms, and zucchini, soy sauce and mirin. Remember to be careful when adding the soy sauce, just add enough until the rice is evenly coated.

In a separate frying pan make an omelette, then cut it into small strips. You can also make scrambled eggs. Add it to the rice mixture. Add the remaining half of the onions. Cook for an additional minute. Then turn off the heat. Add the green onions on top and just let it sit for a minute. Mix it all in right before serving.

Garnish with carrot flowers if you have a cutter. Otherwise just sprinkle with parsley, and voila there you have it, a meatless treat!

Celebrating the beginning of Fall with… Shrimp and Scallops Bisque

I love Fall… I know we don’t actually have a Fall here in Florida (don’t remind me, it makes me cry) but I like the idea of it and what it represents. To me it represents that winter, my favorite season, is just around the corner (yes don’t remind me we don’t really have a winter either -_-), that the holidays will start soon, that it is a time for family, that a lot of cooking will happen, that people will be kinder for a little bit. I honestly wish I lived in a place where the leaves turn gorgeous shades of red, and coats, scarves, and mittens are necessary.

However, for now, that is not where I am located. I am in Florida -_- and must do with cranking the AC to the low 60s and decorating my house in tons of fake fall foliage. I will be posting a lot of Fall themed recipes in the months to come, but for today I decided to celebrate the beginning of Fall with a bowl of Shrimp and Scallops Bisque. Why? Because it is a hot bowl of stick to your ribs food… and because I had shrimp and scallops in my fridge.

Fall 2

Ingredients:

-1 lb peeled and deveined shrimp

-1/2 lb scallops

-2 Tbsp vegetable oil

-1 red onion (can use vidalia, yellow, whatever you have at hand)

-1 Tbsp chopped garlic

-1/4 cup spiced rum

-1/2 cup red wine

-1/3 cup tomato sauce (can add more if you like a stronger pink)

-1 cup whole milk

-1 cup heavy cream

-3 cups chicken stock or seafood stock

-1/2 stick of butter

-1/4 cup of flour

Set chicken stock to heat. When it is almost boiling add shrimp and blanch for a minute. I did this to get that shrimp flavor into the stock, you can avoid this step if you use seafood stock. Keep stock simmering on low heat.

In a large dutch oven pot add vegetable oil, when it is hot add the onions. Let cook for ten minutes on medium heat. Then add garlic, cook for only 30 seconds to a minute (remember, garlic is a delicate butterfly that can not be cooked with any direct heat for long periods of time).
Add the shrimps and scallops. Saute for 5 minutes. Then add spiced rum and red wine (you might want to remove the pan from the heat when you do this step, wouldn’t want you to get a fire facial). Let cook for five more minutes in order to remove the alcohol from the sauce.

Get all the shrimp and scallops out onto a cutting board. Add all the remaining sauce to the chicken stock. Clean pot with a paper towel. Set on medium heat and add butter to the pot to start melting. Keeping an eye on the butter quickly chop your shrimps and scallops into small pieces. Add the flour to the butter and stir with a whisk until it is well combined. Let cook for about a minute and then slowly add the heavy cream and milk while constantly stirring with your whisk. Let cook for five minutes.

Now we put it all together! Add cut up shrimp and scallops, chicken stock mixture, and tomato sauce. Let simmer for about 20 minutes on medium-low heat. After the 20 minutes taste it and add salt and pepper as needed. Garnish with some chopped parsley or chives and serve immediately.


Bento Series #6 — Finger Sandwiches

As you might have gathered from my posts, I tend to run a little short on time some days, which causes me to come up with recipes that are delicious but fast to make (Ain’t nobody wanna spend the night in the kitchen).

These Finger Sandwiches are one of the quickest lunches I can whip-up. Now you might say:

“Silvia, all sandwiches are finger sandwiches, you eat them with your fingers, duh!”

To you I say, WRONG! Finger sandwiches are smaller in size which makes them great as appetizers, for tea time (so sophisticated), or perfect to put in a bento. Ha! I have silly conversations with myself sometimes -_-

Bento Components:

  • Egg Salad Sandwich
  • Spicy Ham Sandwich
  • Cheese Sandwich


Egg Salad Sandwich–

Ingredients:

-6 hard boiled eggs (makes two sandwiches)

-1/4 cup mayo

-1 tsp Dijon mustard

-1/2 tsp sesame oil

-1 tsp soy sauce

-salt and pepper to taste (salt might not be needed)

-1 tsp lemon juice

-1 Tbsp sriracha mayo or spicy mayo

-1 green onion chopped

-2 slices of a hearty bread

Cut the hardboiled eggs in quarters. Add all the other ingredients (except bread and lettuce… that would make an interesting egg salad o_O) and mix, chopping white parts lightly with mixing spoon. The egg will continue to break down as you mix it. I like to have bigger chunks but it is up to you what texture you prefer. If you want bigger pieces for texture, be careful when you mix in ingredients and do not over mix. If you like it to be a homogenous mix, then whip (“now watch me whip, now watch me nene” breaks into dance) mixture to your heart’s desire. Then spread on bread and cut into desired size.


Spicy Ham Sandwich–

-sliced ham of your choice

-sriracha mayo or Asian spicy mayo

-lettuce leaves

– Two slices of a hearty bread

I like to use at least two different kinds of ham for this sandwich. Spread spicy mayo on both slices of bread. Layer lettuce and ham slices, should go something like this: lettuce, ham 1, ham 2, ham 1, ham 2, lettuce. My husband is a firm believer in the correct science of sandwich layering, so trust me when I say this is the best way to layer this sandwich for optimal enjoyment. Cut sandwich into desired size (small rectangles, diagonally, circles?) and serve.


Cheese Sandwich–

-2 white American cheese slices

-2 cheddar cheese slices

-2 smoked Gouda cheese slices

-1/4 cup mascarpone cheese

-1 Tbsp diced chives

-lettuce leaves

-2 hearty whole wheat bread slices (or whatever you prefer)

Mix mascarpone with chives (can substitute mascarpone with cream cheese) and spread on bread slices. Layer as follows: lettuce, 1 slice of each cheese, 1 slice of each cheese in the same order, lettuce.


There you have it, very simple sandwiches for those days you only have ten minutes in the morning to throw something together because you passed out the night before without getting around to prepare lunch (What??? I’m not talking from experience >_>).

The egg salad sandwich is also great for tea parties!


Stud Spuds: How to Make a Potato Pop

I saw these wonderful little potatoes making the rounds on Pinterest and thought, “Huh, this might be a good idea.” So I decided to come up with my own recipe for it.

Now if for some reason you are not convinced that these would be ABSOLUTELY delicious, then to you I say: POTATOES. WRAPPED. IN. BACON…

If you would like a more eloquent description, then let me tell you that the potatoes are creamy and soft while the bacon is crispy, and both flavors complement each other like they are soulmates (and we all know that while potatoes like to dally with sour cream and butter from time to time, its true love is bacon).

As a matter of fact, I had a game night last weekend where I served these. They did not last five minutes. Actually I believe one of my guests requested them for her birthday, Christmas, and any other gift that I might ever give her!

But I digress, here is the extremely hard recipe for these morsels of goodness:

-1 package of baby potatoes (a golden variety preferred)

-1 package of bacon (go for a thick cut)

-salt and pepper to taste

-2 Tbsp vegetable oil

-chopped parsley or chives for garnish

Set oven to 400 degrees and let it heat.

Meanwhile toss the potatoes in a baking sheet with salt, pepper and oil. Bake for 20 minutes or until fork tender (you stick a fork in them, if it goes in it is ready, if the potato repels you like it has an anti-fork shield, put it back in the oven and show it who is boss!). Set aside until it cools to room temperature. Then cut all your strips of bacon in half. Once your potatoes have cooled wrap each in one of the bacon halves, set them back down in the baking sheet with the seam side down. Bake at 375 degrees for another 20 minutes or until your bacon is nice and crisp. Garnish with parsley or chives. Serve them hot or at room temperature.

That is it. Deliciousness awaits you in less than an hour!

You could also serve them with a sauce if you are so inclined.

Mix the following:

-1/2 cup sour cream

-1/4 cup mascarpone cheese (can substitute with cream cheese)

-2 Tbsp green onions diced very fine

-2 Tbsp chives diced very fine

-salt and pepper to taste

Serve next to your potatoes and see tears of gratitude in the eyes of your guests!


Bento Series #5 — Egg Noodles and Ginger Pork

This is a very Asian bento. All the components are things that could be found in a Japanese bento, however they are extremely easy to make here in the U.S.A., the ingredients can be found in your nearest grocery store, and I have adjusted them a bit for a taste that our palates would enjoy. (Did not want a repeat of the pickled radish incident). These dishes take no time at all to cook, so they are great for a busy weekday night.

Bento Components:

  • Egg Noodles Tossed in a Salty, Sour, Nutty Dressing
  • Ginger Pork
  • Steamed Carrots
  • Simmered Mushrooms
  • Ramen Quail Egg

Today I will be sharing my recipes for the noodles and the ginger pork. In the future I will share how to make a ramen egg, soft boiled or hard boiled, in a post where I have a better picture of the egg, the inside and the outside. Call it vanity but these little eggs did not look that pretty, they looked average in this picture which makes no justice to the amazing flavor that it packs. Yes, I am deeply passioned about ramen eggs and just ramen in general… don’t judge.


image

As you can see I make these noodles a lot, above is a different bento with noodles as well. 

Egg Noodles Tossed in a Salty, Sour, Nutty Dressing–

Ingredients:

-1 package of fresh egg noodles (I get mine from Publix, in the vegetable aisle)

-1/4 cup soy sauce (The Salty)

-1 Tbsp sesame oil (The Nutty)

-1 Tbsp rice vinegar (The Sour)

-1 tsp of mirin (can substitute with 1/2 tsp of honey)

-3 stalks of green onions, chopped.

Cook egg noodles according to package directions. In a mixing bowl add soy sauce, sesame oil, rice vinegar, and the mirin. Then, you guessed it, mix it all together. Once the noodles have finished cooking add them directly to the sauce. Mix everything really well until all the noodles have turned a beautiful brown. Then while the noodles are still warm toss in the green onions. That’s it. Super simple. Can eat warm or at room temperature, which makes it great for bentos!


Ginger Pork–

Ingredients:

-1 pound of pork loin cut into bite sized pieces

-1/2 cup soy sauce

-1/4 cup mirin

-the juice of 1 lime

-1 Tbsp grated ginger

-3 garlic cloves chopped

-1 tsp cumin

-1 Tbsp sesame oil

-salt and pepper to taste

-4 stalks of green onions sliced very thinly

Combine all of the ingredients, except for the green onions, in a bowl. Let the pork marinade in this sauce for at least 1 hour. Then in a saute pan (the frying pan you have that has the tall edges) add 1 Tbsp of vegetable oil and put on medium high heat. Then throw in the ginger pork mixture. Saute, making sure to stir constantly so that all of the pork gets some one on one time with the hot pan (bow chicka bow wow). It will be ready when the pork has absorbed 90% of the sauce.

When this happens, turn off the heat and wait 5 minutes… yes 5 minutes without eating your glorious bounty, I know it is hard, but trust me on this. Just walk away, go do a five minute workout, go start some laundry, go meditate on the delicious feast you are about to eat. Once the five minutes have passed add the green onions. Stir them in and serve. The reason I want you to wait is because if the pork is too hot when you add the green onions it will overcook them and they will barely add any flavor to the dish. But if you let the pork cool slightly then the yummy oils of the green onions will mix with the flavor of the dish without getting overcooked, which makes it taste like a billion times better.

Now if you just absolutely CAN’T wait, if you are coming off a month’s fasting, just did a crazy diet cleanse, or are just impatient, then add the green onions to the top and do not mix them in. Just let it sit for a minute or two while you grab a plate, a fork, a knife, and whatever other side you will be eating with this (rice, bread, noodles are a few of the things that work really well), just before you serve yourself give it a quick mix and enjoy!


When packing either of these dishes into a bento just let them cool to room temperature. They go great with steamed vegetables or a side salad. You can reheat in a microwave, just cover with a moist paper towel when you put them in, to keep them from drying up.

The Easiest Dessert EVER

So remember how I taught you how to bake a cake that was super delicious, super fast and super easy? Well this dessert is even easier and still super delicious. (Using a lot of “Supers” today -_-)

For this one you don’t actually have to make anything. Yes you heard me right, you don’t make anything, you just assemble. So no I am not giving you a recipe, I am just giving you an assembly manual.

You will need the following store bought items:

  • Pound Cake
  • Raspberries
  • Whipped Cream

In its simpler form you get two slices of pound cake and spread whipped cream on each side (a generous amount). Then you place the raspberries on top of one slice (make them stand up if you want to look like a pro at this), and then you just put the other half on top of the raspberries. That’s it! A deliciously sweet sandwich. You can garnish with a cute pick or a sprig of mint, and it will look great and taste even better.

Now, you might say, “Pfff, this is not fancy enough for my refined palate or my guests’.” To you I say, aren’t we lofty… I mean, don’t worry; I got you! Here is an alternative that is a little more elaborate (this one does need a recipe):

Want to make it fall themed? Here is a fall version!

(Here is a picture of fall foliage for your viewing pleasure)

image

Ingredients:

-2 cups whipped cream

-1/4 tsp of cinnamon

-1/2 tsp of vanilla (even better if you use the pulp of a vanilla bean)

-1/4 tsp of nutmeg

-1 thinly sliced pear

Mix cinnamon, vanilla, nutmeg, and whipped cream. Careful not to over mix and deflate it. Then assemble same as before, just replace the raspberries with the sliced pear.

Want to make it even more special, and more adult? Macerate (fancy word for soak) the sliced pear in 1/2 a cup of brandy for 30 minutes to 1 hour and you have a pretty refined dessert for your very advanced palate.

But I promise this only takes a second to make and will taste delicious whether it is the simple version or the kicked up fall one!


Bento Series #4 — Soboro Bento

Soboro (AKA clean your fridge and pantry out in the most delicious way possible) is a very popular lunch dish in Japan. It is easy to make, keeps really well and just tastes delicious. You can think of it as a deconstructed fried rice. So I thought, why not make it popular here as well? If Soboro is too hard to pronounce or remember, then call it “Deconstructed Fried Rice” and now you are a fancy schmancy chef! So win-win!

Basically in a bed of rice of your choosing (white, brown, wild, other grains such as quinoa or even couscous could also work) you arrange an assortment of toppings that can later be mixed in and enjoyed with the rice (make sure your toppings compliment your base starch).

Bento Components:

  • Soboro
  • Tamagoyaki
  • Sliced Pineapple
  • Soy Sauce in container

For this soboro I took a look at my pantry and fridge and just grabbed things I had. Like I mentioned this is a great dish to clear out your fridge at the end of the week. Any vegetables and meats can be used! For this one in particular I kept it very simple. It contains white rice, peas, ground turkey, and thinly sliced omelette.


image

Ground Turkey in an Asian Sauce —

-1 package ground turkey

-1/4 cup soy sauce

-1 Tbsp sesame oil

-1 Tbsp mirin (can substitute with Sake or a mixture of white wine and honey; about 1/4 cup wine to 1 Tbsp honey)

-2 cloves of garlic, chopped

-1/2 tsp cumin

-salt and pepper to taste

-2 stalks green onion thinly sliced

Set stove to medium heat. In a pan add sesame oil (Sesame oil has a pretty strong flavor so if your taste buds are not used to it just tell them to WAKE UP and prepare for deliciousness… I mean just add a teaspoon mixed in with a tablespoon of olive oil). Let it heat, then add garlic, let it cook for just a minute or less, be careful with them! Those suckers are such prima donnas, they like to burn in seconds and then will taste horrible and make everything else taste horrible too just to spite you >_< so always keep an eye on your garlic!

But I digress, add the turkey to the garlic, then add the cumin and stir everything together. Let turkey brown for about three minutes. Then add soy sauce and mirin (or sake or white wine mix if that is the route you are going). A couple of notes on this:

Mirin: Can be found at most grocery stores these days, so no excuse for substitution!

Soy Sauce: Is salty, so don’t add salt to the food until the end of the cooking process. You want to taste it first and see if you even need to add salt at all.

Let sauce reduce. Add salt and pepper as needed. Turn off heat. Once the heat is off add the green onions, they will cook with the residual heat. This actually makes a huge difference in the overall taste.


When assembling the bento, let all of your components cool to room temperature. Then fill the bottom of your lunchbox with rice, then ARTFULLY arrange your toppings, channel some Picasso or Dali, completely up to you. The important thing to remember is that you want the toppings to be separated so you can taste all the different flavors once you mix it. It microwaves well, so YAY!


“The Pickled Radish Incident”

Now fun story time, you see those little pink flowers on the turkey?

Picture2

Well, I decided to be Miss gourmet chef and make my own radish pickle. Hey how hard could it be? Japanese people pickle radishes all the time. So I cut the radishes in pretty shapes, because why not? Added them to my pickling mix, and set them to marinade overnight. The next day when I finished making my bento I though, “you know what would be awesome with this? Some pink pickled radish flowers.” So I got my container with a smile on my face and joy in my heart and opened it… Oh dear Lord, why did I open it? It smelled like rotten eggs… It permeated my kitchen, turned my stomach and brought tears to my eyes. I quickly grabbed a few, rinsed them out which made the smell tolerable, and quickly closed the container. I took the bento pictures and then promptly got rid of the flowers. Yes I threw away ALL of them, container and all. Then I sealed the garbage bag and ran out of the house and did not stop until I hit the dumpster… It was a sad day, I guess we are not ready for Japanese pickled radishes yet ;-;

Bento Series #3 — Katsu Sandwich

Oh Katsu, how can I describe thee? A mouth watering, crispy, delicious bite of heaven? That might do it!

Katsu is a Japanese word for a meat that is sliced thin, then pounded even thinner, coated with a breading and fried. If we want to get technical this sandwich in particular is a Tonkatsu because it is made with pork.

But who cares about the name? All you need to know is that it is delicious. However it is Fried. Yes, I said it, that dirty word that means we are going to have to feel guilty while we enjoy every last bite of it, the word that means we will have to negotiate with ourselves and agree to extra laps/treadmill time. Fried >_<

But I have a solution… We can oven “fry” it. So I will be giving you two options, for those of you who want to be naughty, fry that glorious tonkatsu in peanut oil. For those of you who say ” Oh, no I can not negotiate another lap, I already ate chocolate/cake/icecream/insert any other delicious food, I simply can not spend the rest of my life running” I will tell you how to make it in the oven!

Bento Components:

  • Raspberries Stuffed with Blueberries
  • Katsu Sauce
  • Tonkatsu Sandwich


Tonkatsu Sauce —

Ingredients:

-2 Tbsp Mayo

-1 Tbsp Soy Sauce

-1 tsp Worcestershire Sauce

-1 tsp Katsup

-1/2 tsp chopped Garlic

-Pepper to Taste

Mix all of the above ingredients. Be careful on the amount of garlic you add. You will not be cooking this sauce so it might get a little strong. If you are planning to eat this near your love interest, you might want to skip the garlic all together, but it is up to you. The sauce will keep well for a couple of days if you put it in an airtight container in the fridge.


image

Tonkatsu —

Ingredients:

-4 thinly sliced Pork Cutlets (About 1 butterflied chop per person)

-2 cups of Panko

-2 eggs (beaten with a Tbsp of water added to it)

-1 cup of all purpose flour

-Salt and Pepper to taste

-Juice of 1/2 a lemon

-1 tsp garlic powder

-1 tsp onion powder

-2 cups Peanut Oil if frying

-1 Tbsp Olive Oil and 1 Tbsp Sesame oil if Baking

Pound your pork until it is a very thin cutlet. Release your anger and tensions, but with caution since we are trying not to break it, you just want it very thin.Season the pork with salt, pepper, and lemon juice.

Mix the flour, garlic, and onion powder. Set up a dredging station. First dip the pork cutlet in flour. You want all of it to be lightly coated. Then pass it through the egg, same thing, coat everywhere with a light layer.

IF FRYING: Finish your dredging by coating your cutlet with plain panko. Make sure you coat it very well. Fry on medium until both sides are golden brown. When you take it out of the oil let it “rest” for a few minutes on a paper towel to drain the excess oil.

IF OVEN-FRYING: If you are going to make this in the oven you need to add an extra step to your preparation. We are going to toast our panko. If you don’t do this step your pork will resemble a hockey puck by the time the outside gets golden and crispy. So on a frying pan add the olive and sesame oil. Set on medium. Add the plain panko and toast. You need to constantly stir it so that it doesn’t burn. As you stir, the oils will mix in with the panko and will aid the toasting process. Once it looks golden and delicious set it in your dredging plate and let it cool to room temperature, or to a temperature you are comfortable handling (In other words, DON’T BURN YOURSELF). Finish dredging. Set your oven to 375 degrees. Cook pork for 20-25 minutes. If your cutlet is very thin then 20 minutes should be enough. If it is a little thicker then you are looking at 25 minutes.

There you have it! Now all you have to do is assemble it! Get your bread, spread Katsu sauce on it. Set your golden cutlet on it, then top with thinly sliced cabbage. Trust me on that one, the cabbage actually tastes great with the pork, the French agree and so do the Japanese, so give it a try!


Note: For the bento. The best way to reheat the katsu whether it was fried or baked is in the oven or a toaster oven. Set to 375 for 10 minutes in the oven, 3-5 minutes in the toaster oven. You can even get creative and try it in the toaster… I have not tried a toaster so let me know how it goes! If you don’t have an oven you can microwave it, but I have to warn you that it will get hard and dry. So I would actually recommend eating it at room temperature if there is no oven available.

Do not add the sauce to the bread until you are going to eat it. It will make your bread and cutlet soggy. So I would recommend doing a deconstructed sandwich. Put cutlet in your bread, sauce in a separate container or resealable bag, and cabbage separate as well. Assemble once you have reheated. And by their powers combined you shall have deliciousness!

Peanut Butter Cake with Chocolate and Amaretto Ganache

Peanut Butter Cake with Chocolate and Amaretto Ganache

Don’t you sometimes feel like a delicious dessert but are too lazy to spend hours in the kitchen creating one from scratch? Or you need to impress someone with your cooking skills but have no time between work, family, facebook, instagram, twitter, snapchat, tumblr and youtube?

Then have no fear! I have a hack for you! A simple answer to your problems! Buy a cake mix! Now hear me out, I know that many frown upon the use of such a shortcut, but there are ways you can make a deliciously moist cake out of a simple mix.

This is what you have to do to get the best cake possible from any mix:

  • Substitute the water for whole milk.
  • Use room temperature eggs.
  • DO NOT over mix. A few small lumps are ok.
  • DO NOT over bake. Make sure you keep an eye on your cake. If you just follow the time in the box you might end up with a dry possibly burned cake. Remember that all ovens are not created equal and yours might cook it faster than what the box anticipates. So check it often!

For this cake you will need a few other ingredients than just the ones the box calls for:

Ingredients:

-Cake Mix (Yellow, Buttery, or White works well)

-Use whole milk instead of water. (Follow box measurement)

-Use peanut oil instead of vegetable oil. (Follow box measurement)

-Add 1/4 cup peanut butter. (Can use chunky, sugar, no sugar, whatever you have at hand)

-However many eggs it asks for at room temperature.

Make cake according to box directions. Just keep an eye on it. Once finished let it cool to room temperature.

Meanwhile let’s make a simple yet fancy ganache (Sounds fancy doesn’t it?) to go over our cake.

Chocolate and Amaretto Ganache–

Ingredients:

-1 package of chocolate chips. Can use bittersweet, semisweet, or dark chocolate.

-3/4 cup heavy cream.

-2 Tbsp Amaretto. (An almond liquor. Oh yeahhhh boozy goodness)

In a small saucepan heat heavy cream to a boil. As soon as it starts boiling, pour it over the chocolate chips. Stir until it becomes a smooth mixture. Then add Amaretto and stir until combined. Now let it sit for a while so that it cools a little. As it cools it will harden which will make it stick to the cake.

Pour over the cake starting at the center and spreading to the edges until you have covered all of the surface area. Decorate cake with strawberries and drizzle them with a little of the ganache.

Now you might say, this still sounds like too much work for me! Well never fear, I have an even shorter shortcut for you! (Though I got to say your level of laziness… I mean time-saving skills has impressed me!)

No time to make a ganache? No problem. Buy a container of pre-made chocolate frosting! Add 2 Tbsp of Amaretto to it. Mix well. And then spread over your cake! That’s it.

So there it is, the easy way to make a pretty, delicious cake that will make you look like a kitchen god/goddess.